Welcome back to another quick troubleshooting blog. Today on EFX Tv we are going to fix one of the well-known errors you may have come across. I was performing an Android rat setup and found that there are my videos where nobody has explained how easy it is to configure Java 8 which is the most required thing to run APKtool and create an Android Payload.
Quick commands to Install Java 8 on Ubuntu
As always we're going to make it fast.
What is Java 8?
How to install Java 8 on Ubuntu/Linux?
How to avoid errors being occurred?
Why Java 8 We can use default one java 11 as well?
____________________________
If you are in a hurry you can skip this paragraph. Else read carefully to avoid the errors.
Overall, to install Java 8 we need to do a few things. First check for the default java version installed by Linux. If it is Java 8, then you might have not clicked on thins link. Anyways thanks for clicking. This page is the solution to all the errors you are facing with Java 8 installation on your Ubuntu machine. Once you checked for the java version the next step is to check for your operating system version if it is 32 bit or 64 bit.
Once you are done with that, now find for the available versions of Java 8 your machine has assigned to install. Make sure you should select the appropriate version. After that use the installation command with the default parameter. Once again check for Java Version. If it still says Java 8. Run another command and get it fixed.
What is Java 8?
Java 8 is a newly released version for development reasons. It has a huge set of upgrades to the model(new Classes, JVM Java language, and libraries). It is also known as features for productivity, ease of use, improved programming routine in java, security, and enhanced performance.
How to install Java?
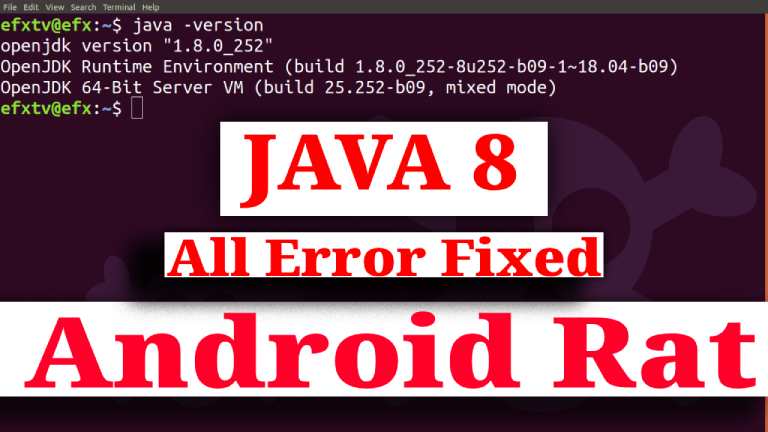
Before I move to the installation part I'd like to show you how to check if java is there in our ubuntu system or not. To check for Java simply run the command:-
java -version
You will be able to see thins like below.
To install Java 8 run commands written below.
1st Command update and upgrade
>sudo apt-get update && sudo apt-get upgrade
2nd Command check the version of your Linux system
>hostnamectl
3rd command search for the available version of JDK
>sudo aptitude search jdk
4th Command JDK and JRE installation
>sudo apt install openjdk-8-jdk openjdk-8-jre
>sudo apt install openjdk-8-jdk openjdk-8-jre -set-default
5th command update and upgrade
>sudo apt-get update && sudo apt-get upgrade
6th command again check for java version
>java -version
7th Command if it still says 11, run another command
>sudo update-alternatives --config java
It will look like below
8th command, check for Java version once again.
>java -version
How to avoid errors being occurred?
Make sure you should use all the commands with sudo, if it possible, use the 7nth command with su+enter (type su and hit enter the superuser password and rn the command 7) the 7nth part has never been explained. If you don't use it using sudo you may get error 99%.
Cheers, all error has been fixed. I hope you loved this post. We will get back very soon with some more easy ways to do the most difficult and unexplained things.
Why Java 8 We can use default one java 11 as well?
Java 8 is the most advanced version provided by Java, SO FAR. You should use this to compile and decompile the APK's and JAR files. Most of the compiling work gets processed by Java 8 even in .EXE files also.
This was it for the day. I hope it was quick and helpful to you. We will get back very soon with some more easy tricks, to do the most difficult and unexplained Linux tips and tricks.